wordpress · · 3 min read
Installing WooCommerce on WordPress
Installing WooCommerce on WordPress
There are various solutions available for setting up an online store on an existing WordPress site, with WooCommerce being one of the most widely used plugins. This tutorial specifically covers the installation of WooCommerce.
How to Install WooCommerce
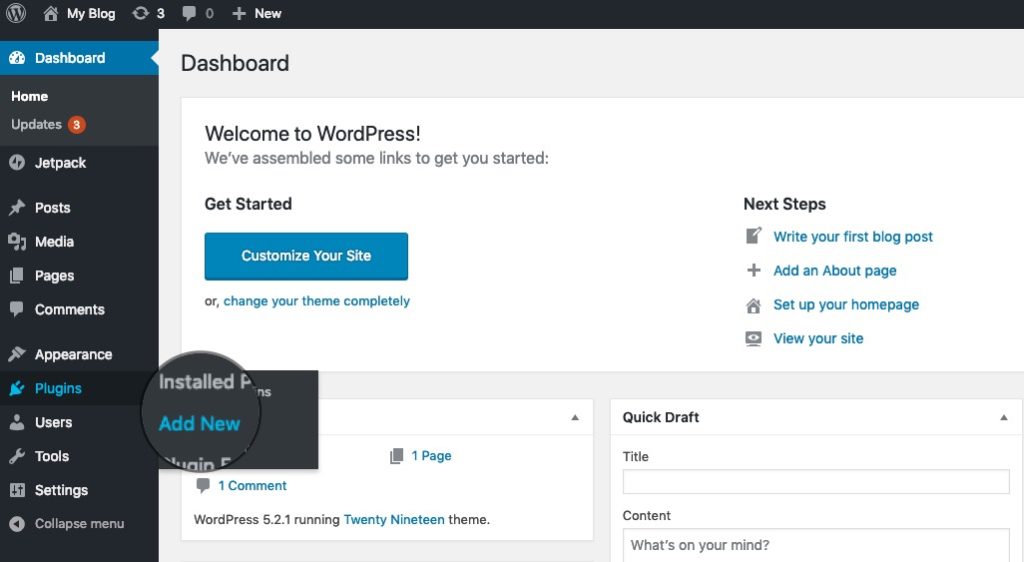
Log in to the admin area of your WordPress installation and navigate to Plugins > Add New.
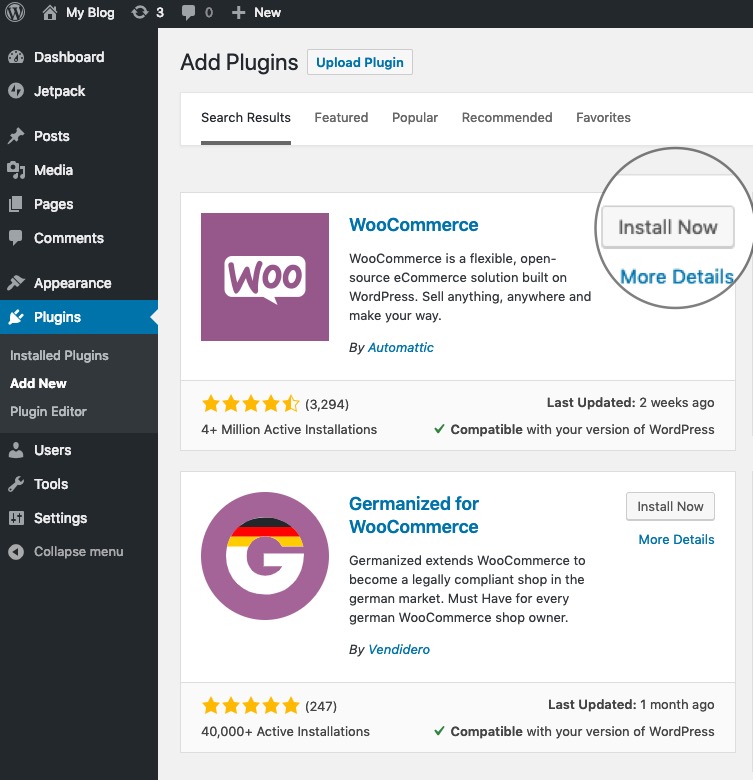
In the search field, type “WooCommerce.” The WooCommerce plugin should appear as the first result. Click Install Now to install it.
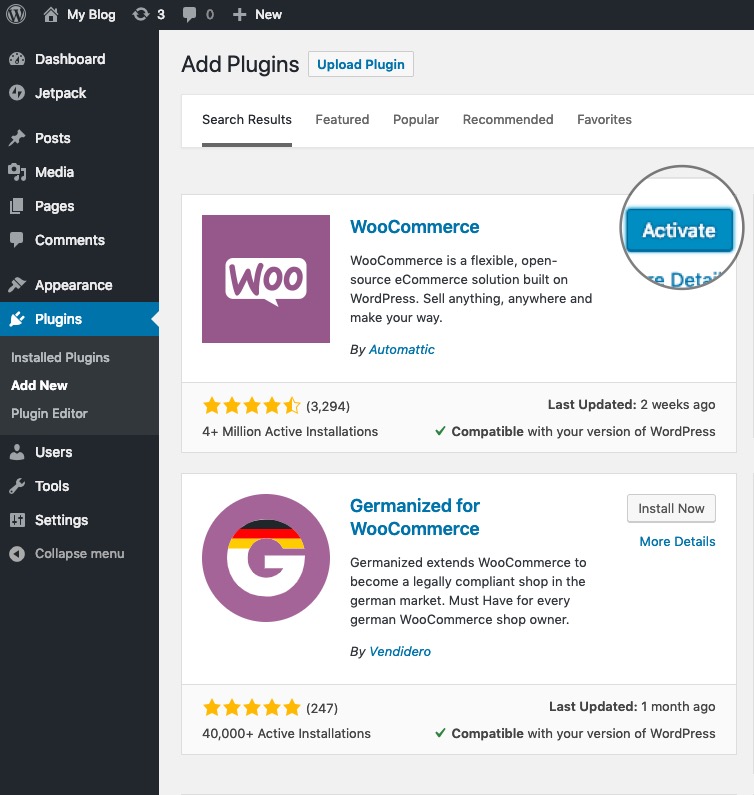
The plugin will automatically download and install to your WordPress site. Once the installation is complete, click Activate.
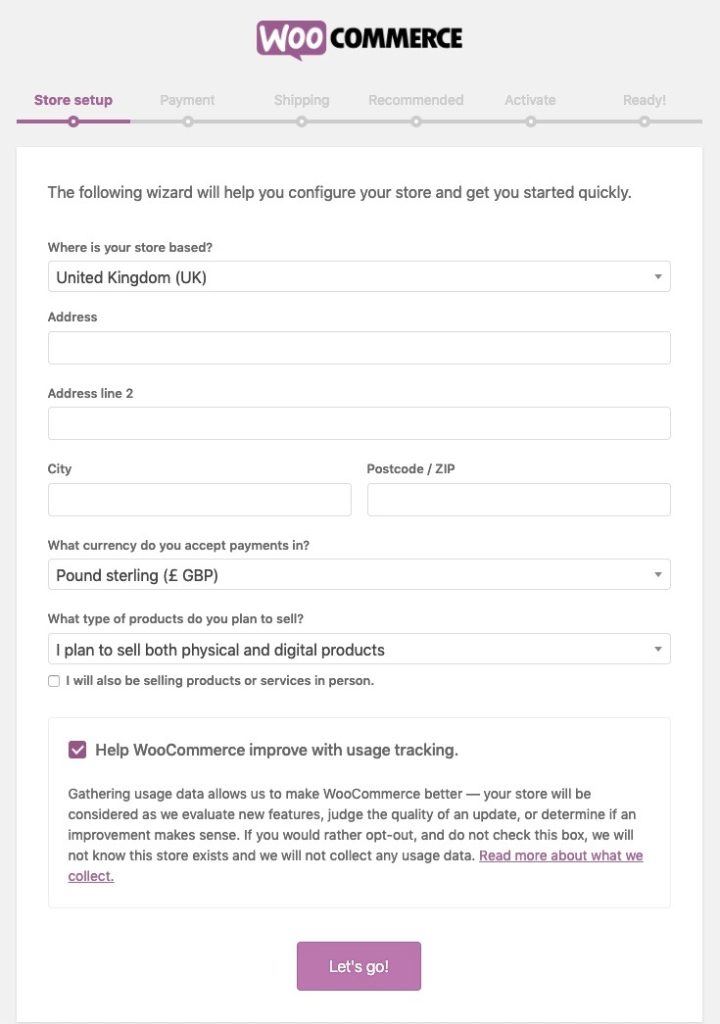
This will take you to the initial configuration wizard of the plugin. You will see the Store Setup page, where you can configure the store’s location, address, and the currency used. Select the appropriate options based on your target audience, then click Continue to proceed to the next step.
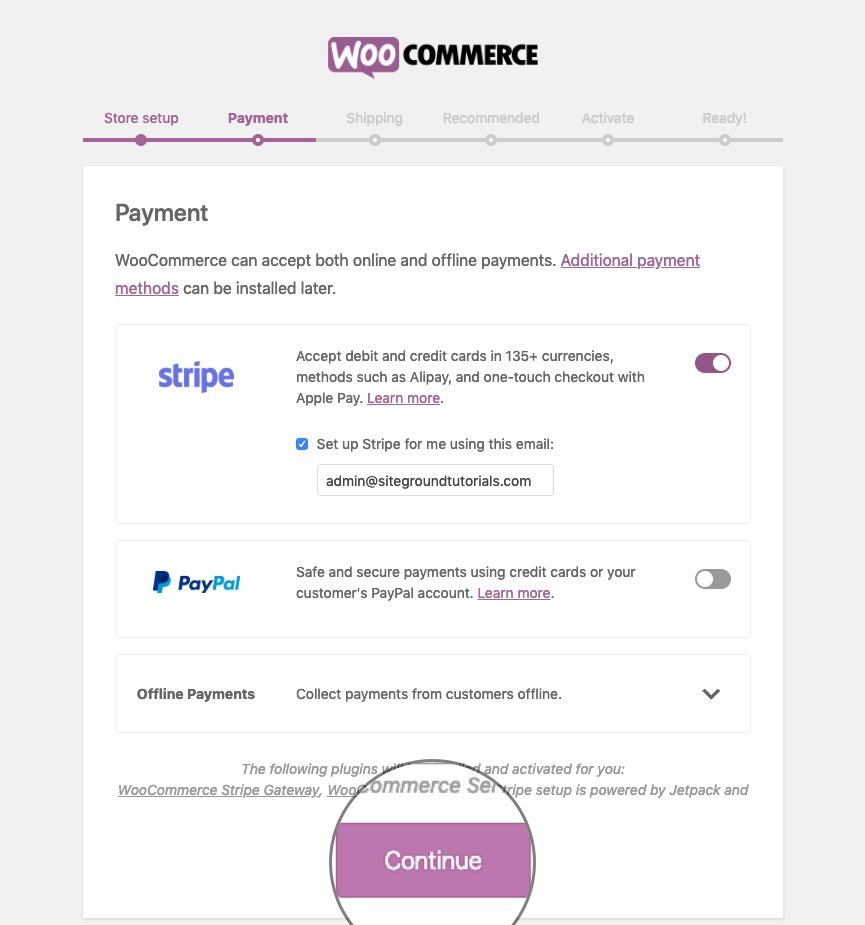
The next step of the wizard is Payment Configuration. You can select popular payment methods and enable one or more for WordPress. After selecting the desired payment methods, click Continue to move on.
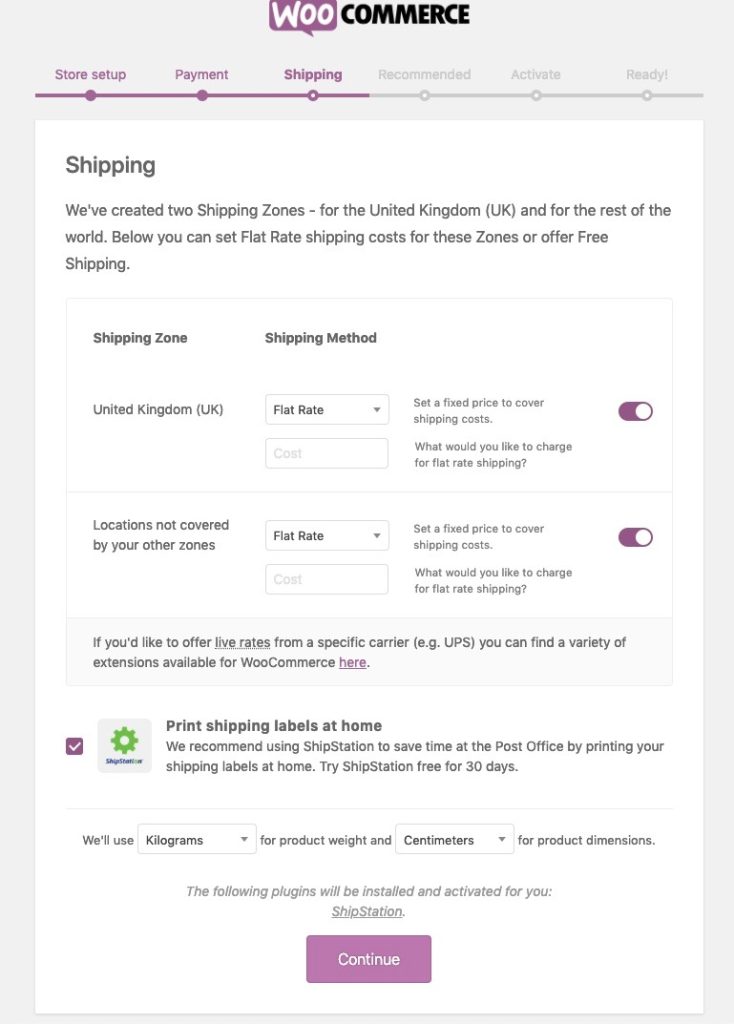
On the following page, you can configure Shipping Options. Choose the appropriate settings and click Continue again.
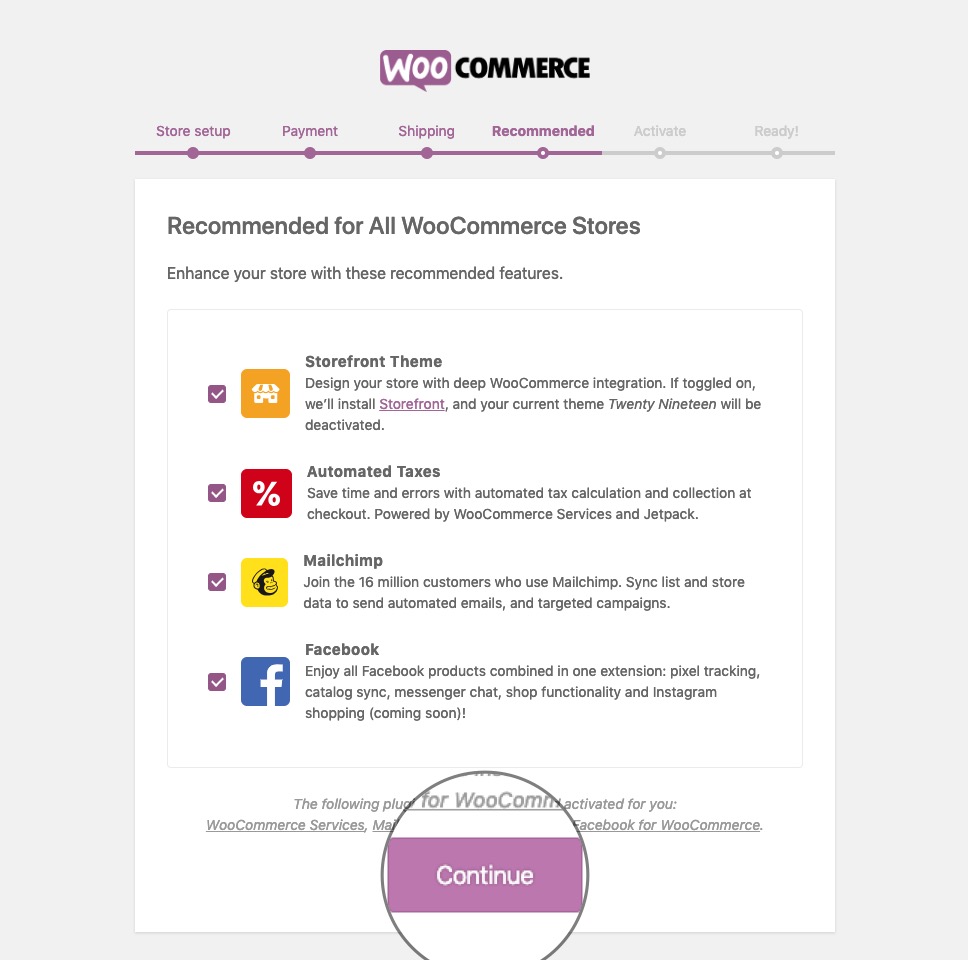
In the next step, called Additional Plugins, you will be prompted to install and activate the Storefront theme, enable automated tax calculations, Mailchimp, and Facebook. The Storefront theme is designed specifically for use with WooCommerce and is recommended for use with this plugin. If you want to use this theme, ensure you check its box. If you already have a theme you want to use, make sure to skip this step.
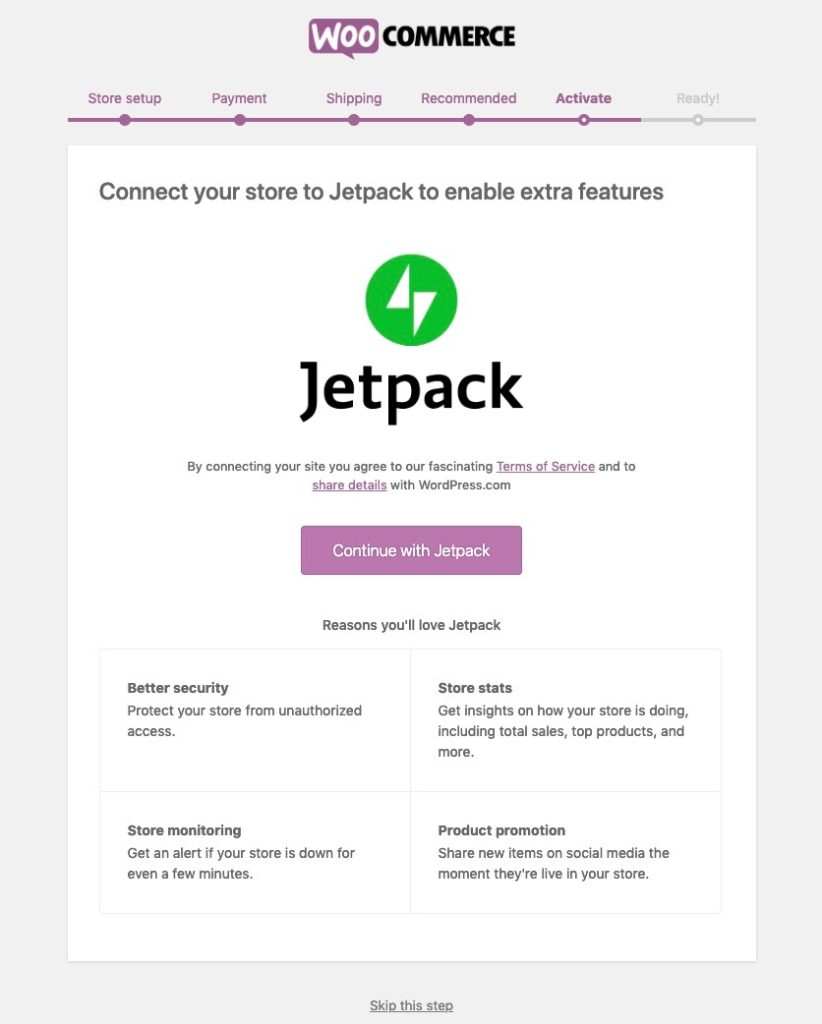
The activation step allows you to connect your store to Jetpack. Clicking the Connect with Jetpack button will take you to the Jetpack authentication page. If you do not want to connect your store to Jetpack, click the Skip this step button at the bottom of the page.
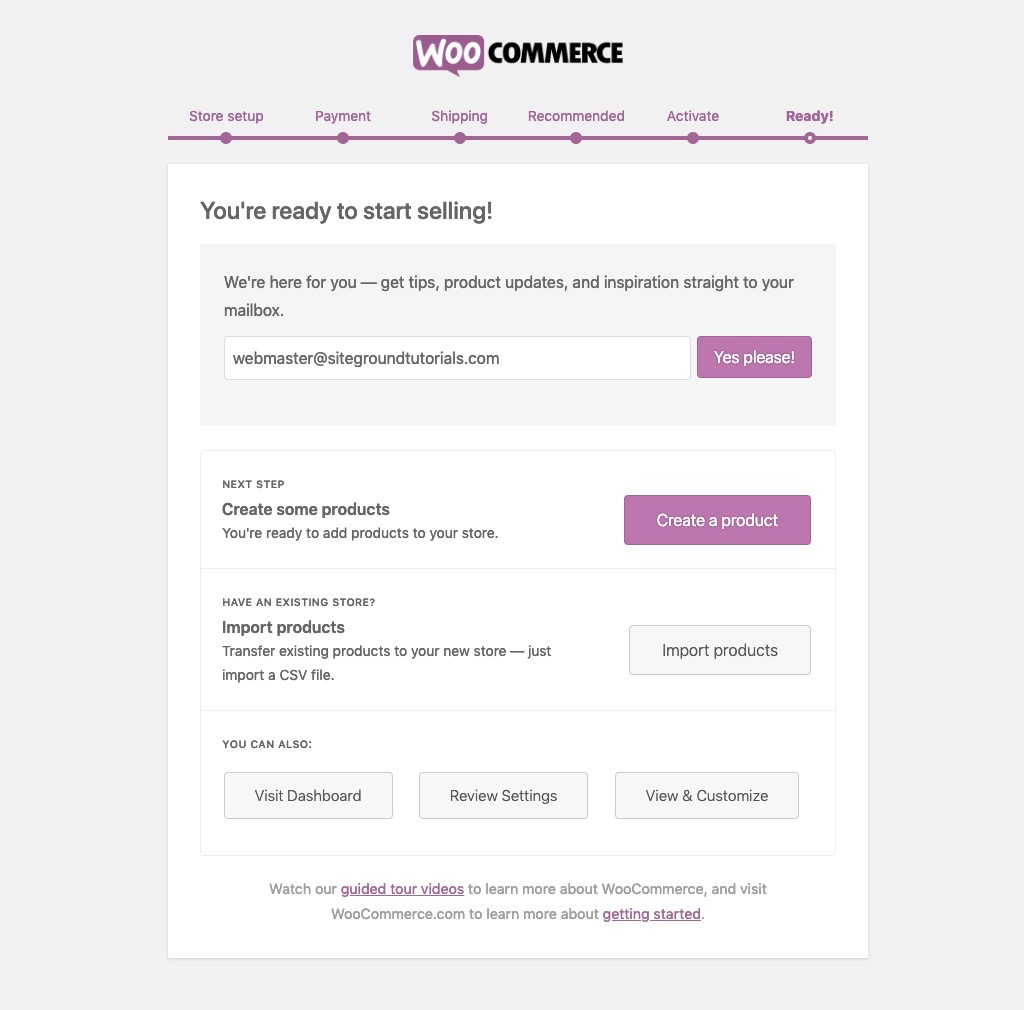
That’s it! The WooCommerce plugin is now installed and set up on your site. You can create a new product by clicking Create your first product! or import products from a .csv file if you have product information from a previous site.
Adding a New Product in WooCommerce
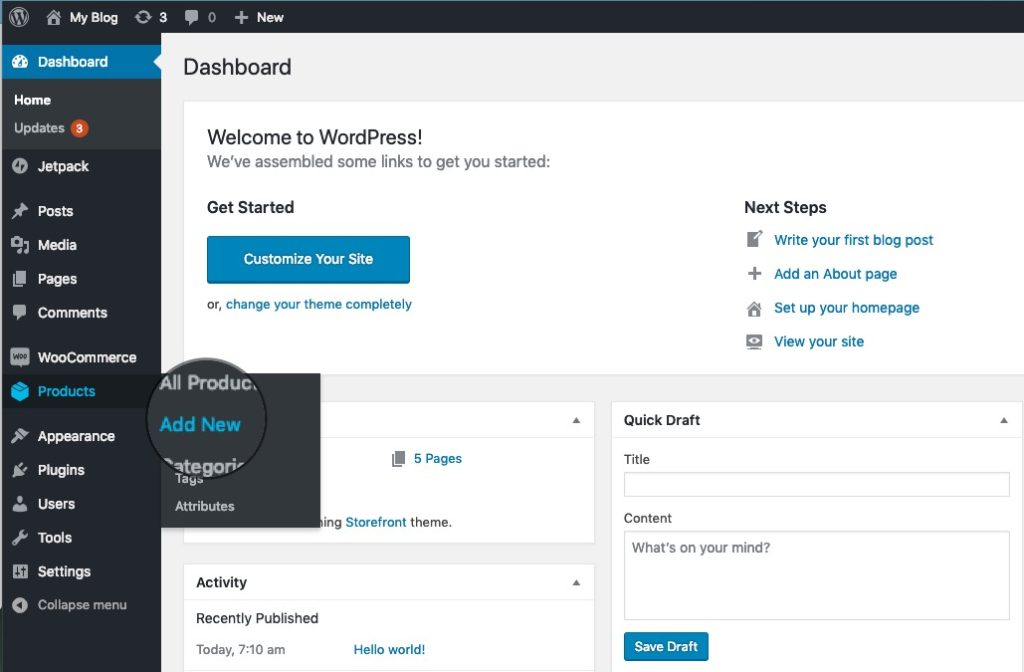
To add a new product to your store, go to your wp-admin dashboard and navigate to Products > Add New.
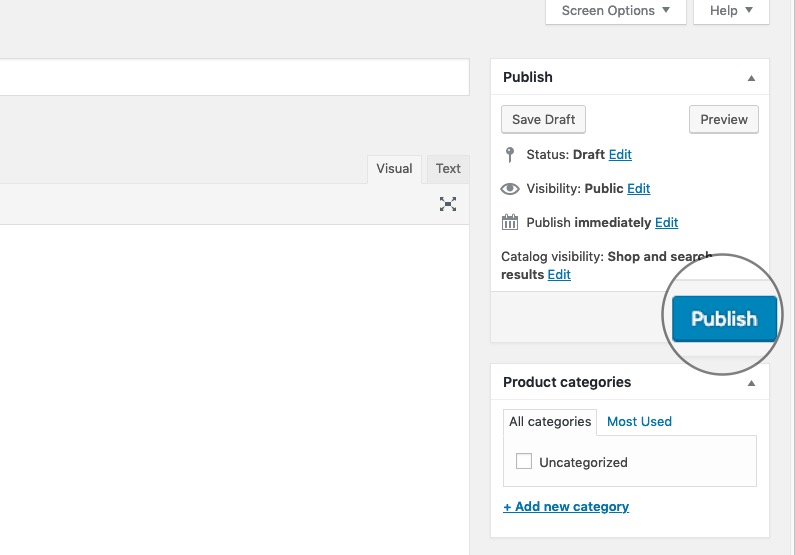
On the page that opens, you can name your new product using the Product Name field at the top and add a description in the text field below it. Below this text field, you have various options to set the product’s price, stock availability, shipping information, and more. When ready, click Publish to make the product live on your site.
And that’s it! Your first product is now created and available in your WordPress WooCommerce store.
Mttao GitHub ↗
Exploring technology and life's wisdom